Installation and operation of the top-down bottom-up Roman blind
PACKAGE CONTENTS:
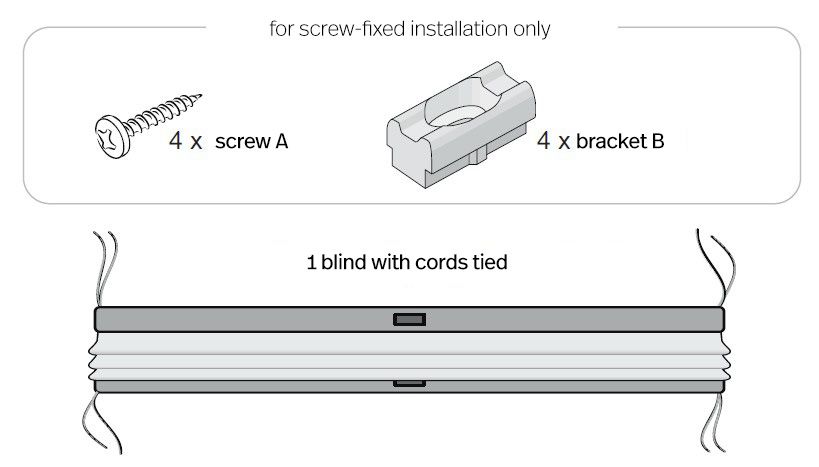
SCREW-FIXED INSTALLATION (INSIDE THE WINDOW RECESS):
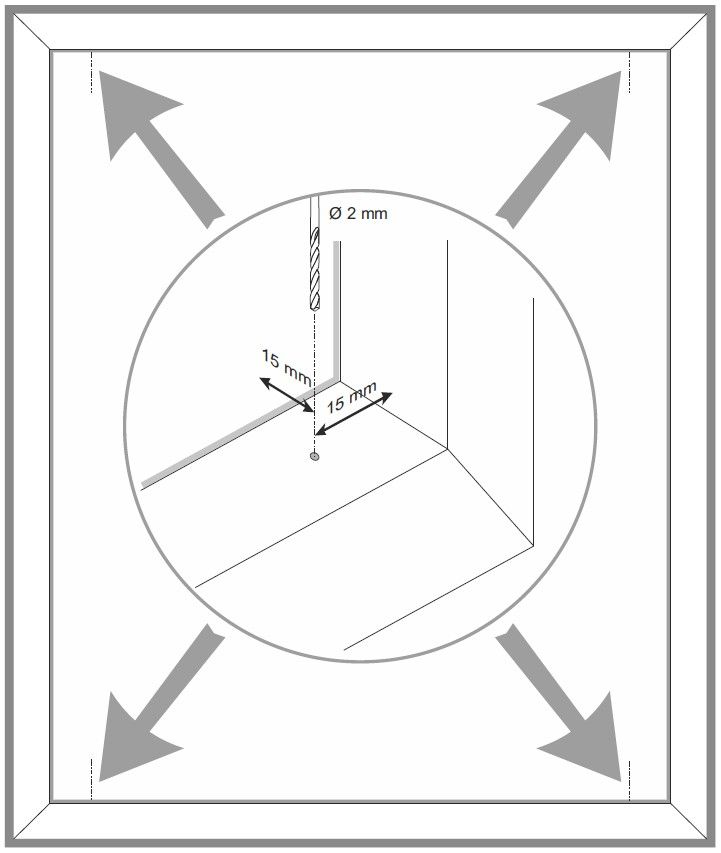
Drill 4 holes with a Ø 2 mm drill bit in the horizontal window frame members, 15 mm from the glass and the vertical window frame.
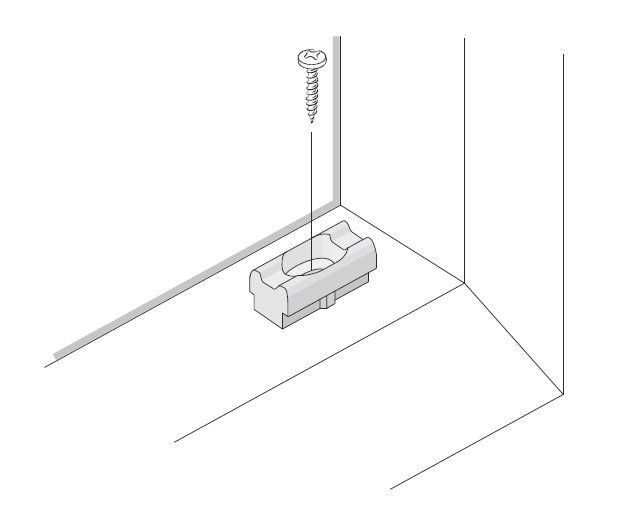
Using screws A, attach the four brackets B into the drilled holes.
Secure the loose blind cords with knots in clips C.
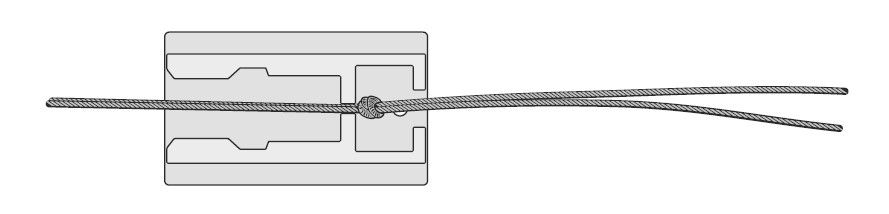
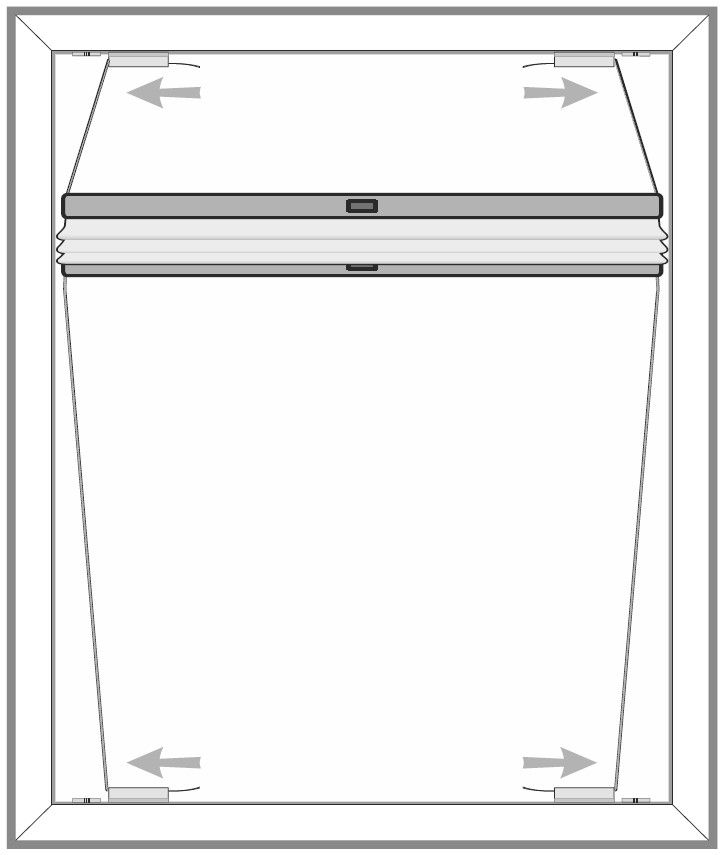
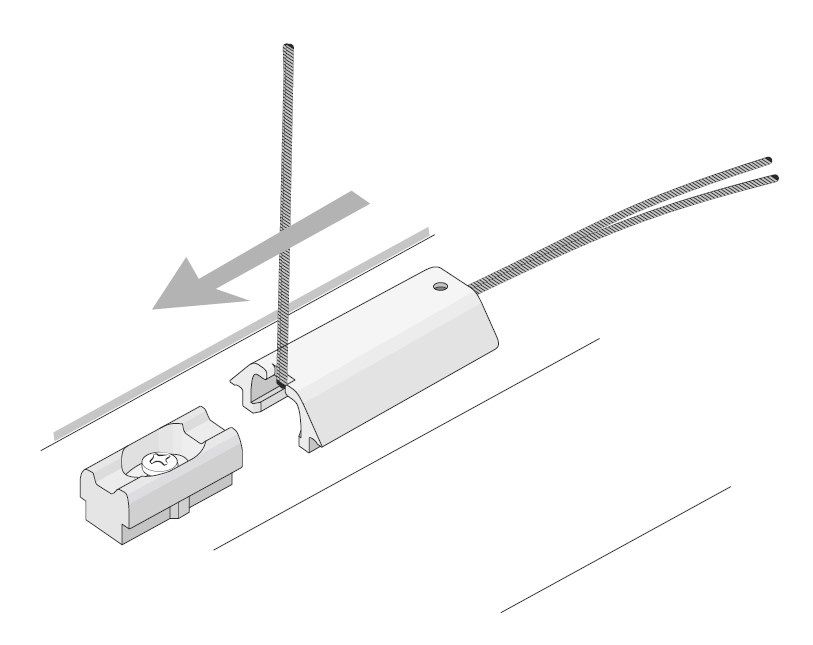
Slightly tension the cords and firmly slide clips C onto brackets B.
NO-DRILL INSTALLATION (ON THE WINDOW FRAME):
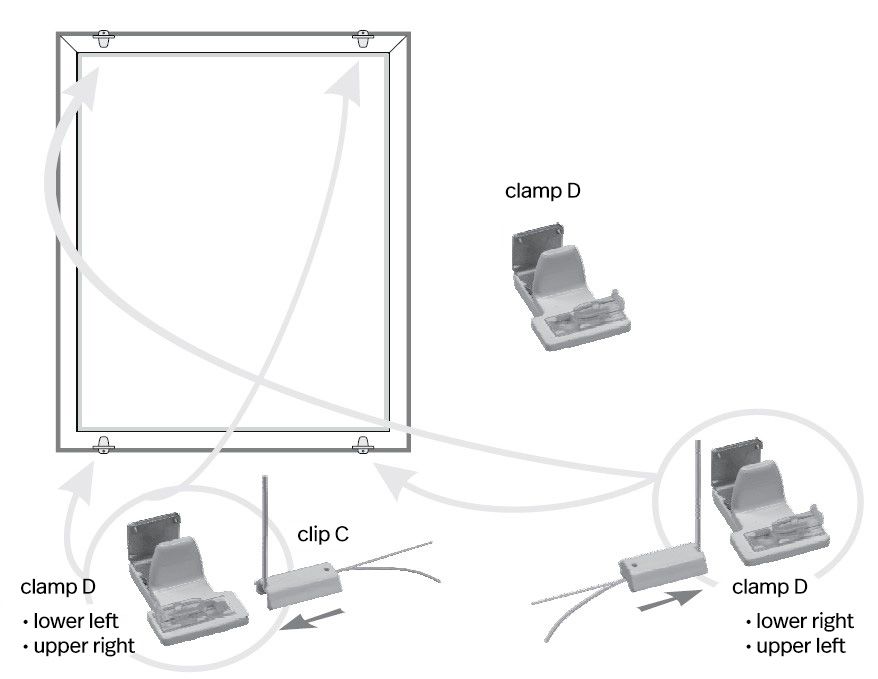
For no-drill installation, place clamps D in the appropriate positions on the window frame and tighten them using the Allen key supplied with the set. It is important to select the correct right and left clamps (according to the illustration below). Then attach clips C to clamps D.
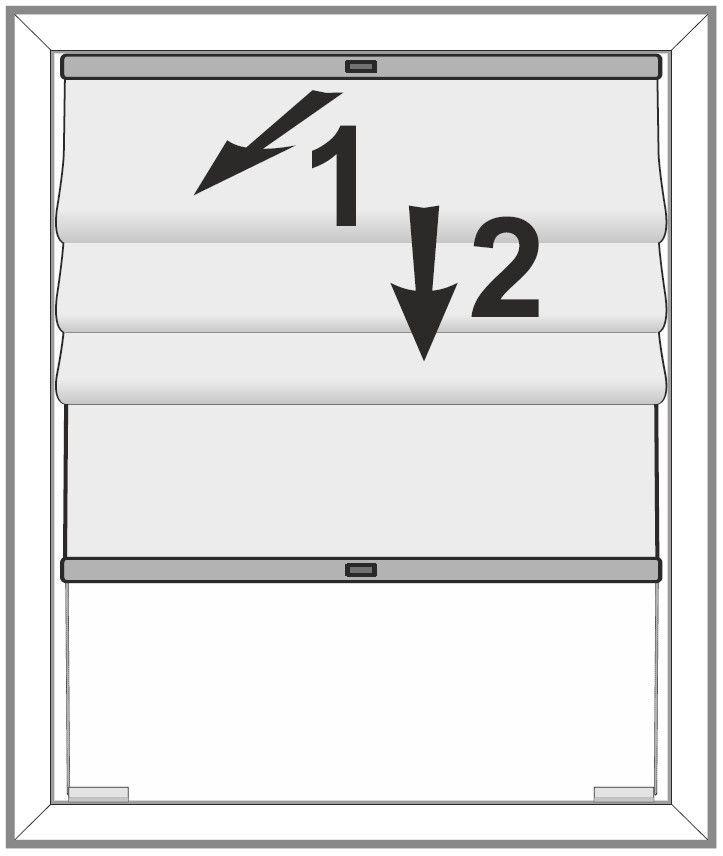
BLIND OPERATION:
The blind rails automatically lock in their extreme positions (top and bottom).
To release them, first gently pull the blind handle towards you and then move it upwards or downwards.
WASHING THE BLIND:
After removal and detaching all non-textile components, the blind fabric can be washed.
CORD TENSION ADJUSTMENT:
If the cord length is not correct, it can be adjusted by untying the knots at the cord ends and retieing them in the appropriate position. Any excess cord protruding from clip C can be trimmed.
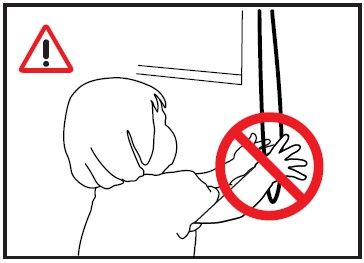
WARNING!
Risk of strangulation!
Keep cords and chain loops out of reach of small children!
The packaging contains small parts!
Small parts may be swallowed and cause choking hazards for children!