Installation and removal of the roof window blind (preparation for washing)
1. Installation of the blind cassette brackets
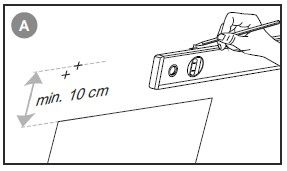
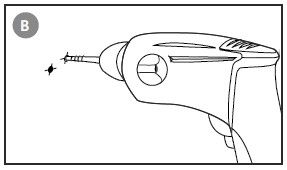
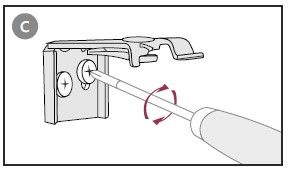
Carefully measure and mark the drilling points for the screws above the window recess (fig. A). The minimum distance from the upper edge of the window is 10 cm. Drill the screw holes. Depending on the wall type, suitable wall plugs may be required (fig. B). Screw the brackets to the wall (fig. C).
2. Installation of the blind side channels
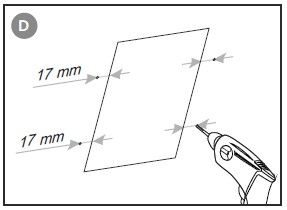
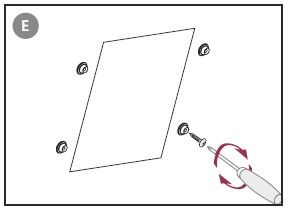
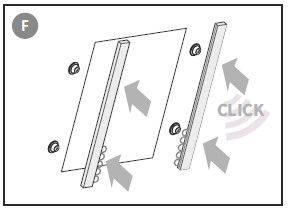
Drill two holes for wall plugs on each side of the window recess, exactly 17 mm from its edge (fig. D). Then screw on the brackets for the blind side channels (fig. E). Gently pressing against the wall, clip the side channels into the mounted brackets (fig. F). The upper edge of the side channels should be positioned at such a height that they fit closely against the installed blind cassette.
3. Attaching the cassette to the brackets
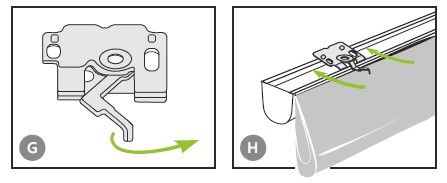
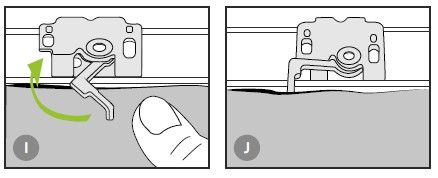
Release the catches (fig. G). Place the blind cassette onto the brackets. Position it from above while gently pressing towards the wall (fig. H). Lock the catches (fig. I). Correctly installed blind (fig. J).
4. Securing the blind
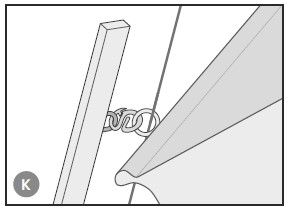
Starting from the top, attach the gliders located in the side channels to the rings using the “S” hooks (fig. K).
5. Installing the chain tensioner
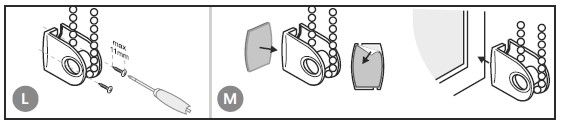
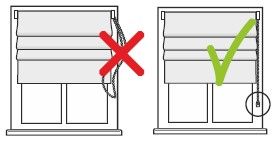
To prevent the chain from hanging loosely next to the window, it is recommended to install the chain tensioner included in the set. Installation using screws (fig. L) or adhesive tape (fig. M).
6. Washing the blind
The blind is attached to the cassette with hook-and-loop tape. To wash the blind:
- detach the “S” hooks from the rings
- remove the blind cassette from the brackets
- fully lower the blind
- detach the cords and remove the horizontal support rods
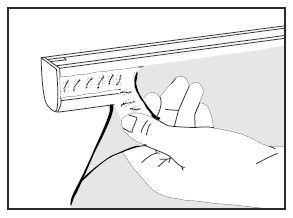
- detach the fabric from the cassette (hook-and-loop tape)
After washing and ironing:
- reattach the fabric to the cassette
- insert the horizontal support rods
- thread the cords through the rings
- even them out and tie them at the bottom
- reinstall the blind onto the brackets
- attach the “S” hooks to the rings
OUR TIP: Before unthreading the blind cords, take a photo of the cord arrangement. This will help you rethread the cords correctly after washing.
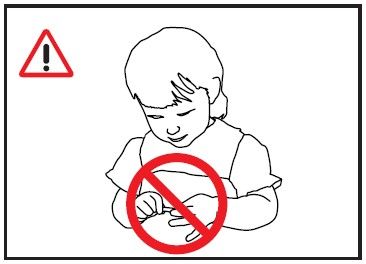
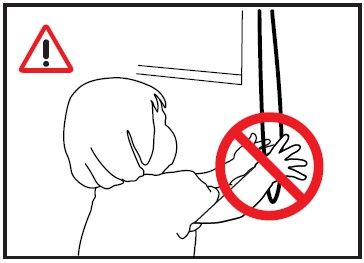
WARNING!
Risk of strangulation!
Keep cords and chain loops out of reach of small children!
The packaging contains small parts!
Small parts may be swallowed and cause choking hazards for children!